Buying windows and doors from China can offer strong value, precise manufacturing, and many design options. Yet product quality alone does not guarantee a successful project. Correct window door installation protects the building from rain, air leakage, heat loss, and premature damage.
Joseph Lstiburek, a respected building scientist and building-envelope expert, often says, “Water is the only thing that matters.” His words are especially relevant at the sill, frame corners, and exterior joints. A small gap behind the frame can become a serious leak after several seasons. Wind exposure, wall materials, drainage design, and local climate all influence the installation method.
Details matter.
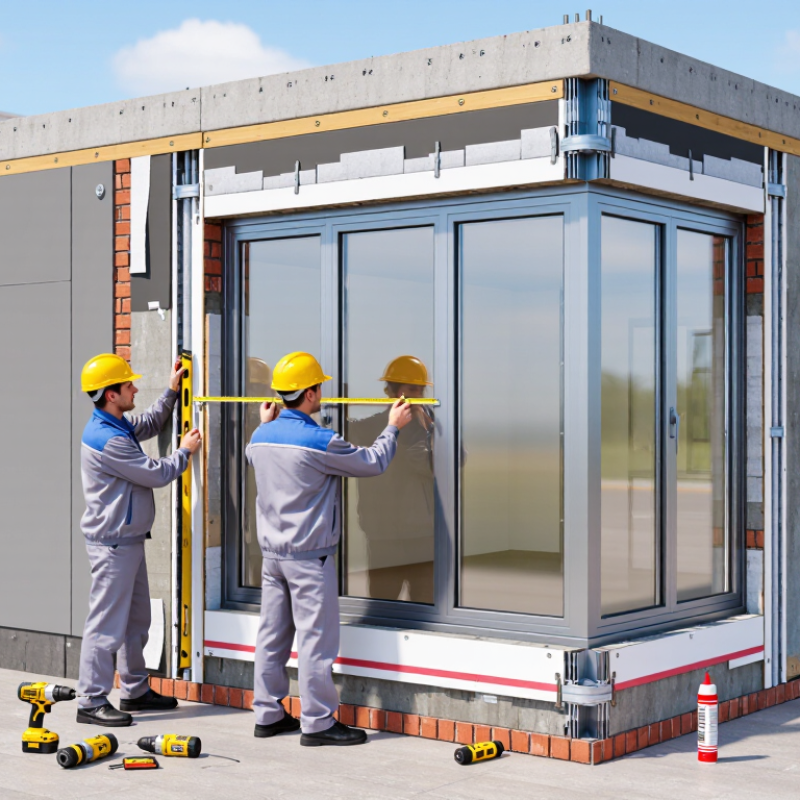
This guide helps global buyers understand the complete process. It covers opening preparation, measurements, flashing, insulation, anchoring, sealing, glass protection, and final inspection. It also explains how buyers can communicate clearly with Chinese manufacturers before production begins. Shop drawings, tolerance requirements, drainage paths, and installation manuals should be reviewed carefully. A beautiful door may still perform poorly if the threshold sits unevenly.
Experienced installers know that jobsite conditions rarely match drawings perfectly. Walls may be out of square. Fasteners may be unsuitable. Weather can interrupt sealing work. These problems require judgment, not rushed correction. No guide replaces local professional inspection, and this article cannot predict every building condition. That limitation deserves attention.
Reliable window door installation depends on three connected elements: a suitable product, accurate preparation, and disciplined workmanship. Global buyers should evaluate all three before placing an order. Proper planning costs less than removing a leaking frame later.
China Best Window Door Installation Guide for Global Buyers
Set Performance Targets: U-Value ≤1.5 W/m²·K and Air Leakage ≤1.5 m³/(m²·h)
Set these targets before requesting quotations. The U-value should describe the complete window, not only the glass. Lower values reduce heat transfer through glazing, frames, and spacers. The UNEP Global Status Report for Buildings and Construction 2024 states that buildings consume about 32% of global energy and produce roughly 34% of global carbon emissions. Better envelopes directly support lower operational demand.
Air leakage deserves equal attention. Under EN 12207, the maximum air permeability for Class 4 is commonly listed as 3 m³/(m²·h) at 100 Pa. Your target of 1.5 m³/(m²·h) is more demanding. Request laboratory results under EN 1026 or an equivalent test method. Confirm the tested window size, pressure range, and measurement basis. A small laboratory unit may perform better than a large installed unit.
Tips: Specify whole-window Uw ≤1.5 W/m²·K. Require airtight installation tapes, sealed corners, and tested hardware. Inspect every joint.
Field inspections often find gaps behind the frame, even when factory results look excellent. Do not assume compliance. Site workmanship can change performance. This is where the guide needs honest revision: installation quality is not a minor detail, and a perfect report cannot repair an unsealed perimeter. Consider repeating an air-leakage check after installation, especially around sliding panels and threshold zones.
| Performance or Installation Item | Recommended Target | Unit / Test Condition | Verification Method | Installation Acceptance Criteria |
|---|---|---|---|---|
| Core Thermal and Airtightness Targets | ||||
| Whole-window thermal transmittance (Uw) | ≤ 1.50 | W/m²·K; complete window or door assembly | Calculation using declared frame, glazing, spacer and size data; confirm by laboratory testing where required | Use the installed product size for the calculation; do not substitute center-of-glass Ug for whole-window Uw |
| Glazing thermal transmittance (Ug) | Typically 1.00–1.10 | W/m²·K; double insulating glass unit with low-emissivity coating and inert-gas fill | Glazing unit declaration or EN 673 calculation | Verify glass build-up, coating position, spacer type and gas-fill specification before installation |
| Air leakage | ≤ 1.50 | m³/(m²·h) at 100 Pa, based on exposed area | Air-permeability test in accordance with EN 1026; classification in accordance with EN 12207 | Continuous perimeter seals; no visible gaps, tears, unsealed corners or open drainage paths into the room |
| Installation-joint air permeability | No uncontrolled air path | Entire perimeter joint | Visual inspection, smoke pencil or calibrated low-pressure air test | Interior airtight seal must be continuous at head, jambs and sill, including all corner transitions |
| Surface condensation control | No persistent condensation under design conditions | Indoor design condition commonly assessed at 20°C and 50% relative humidity | Thermal-bridge calculation or project-specific condensation assessment | Keep interior seal continuous; avoid cold bridges caused by steel packers, exposed anchors or uninsulated gaps |
| Water, Wind and Structural Performance | ||||
| Water-tightness | Project-specific; commonly target ≥ 300 Pa for exposed façades | Pressure in Pa during spray test | Water-tightness test in accordance with EN 1027 | No water penetration to the interior face; drainage channels and weep holes must remain open |
| Wind-load resistance | Calculate for site exposure; common preliminary range 1.2–2.0 kPa | Design pressure in kPa | Structural calculation and/or EN 12211 test | Anchor spacing, substrate strength and frame reinforcement must match the approved calculation |
| Frame fixing spacing | Approximately 600 mm maximum along jambs and head | Centre-to-centre distance | Measured on site before final sealing | Provide a fixing near each corner, typically 100–150 mm from the corner; adjust for system requirements |
| Minimum edge distance for masonry or concrete fixings | Typically ≥ 50 mm | Distance from anchor to substrate edge | Measured against the structural substrate and anchor manufacturer’s data | Do not rely on weak render, insulation or hollow surface layers as the primary fixing substrate |
| Frame squareness | Diagonal difference ≤ 2 mm for openings up to 2,000 mm | Measured between opposite frame corners | Tape measurement after temporary fixing and before final sealing | Correct the frame before tightening anchors or applying expanding foam |
| Opening Preparation and Joint Design | ||||
| Installation clearance | 10–20 mm per side for standard openings | Clearance between frame and structural opening | Measured at head, sill and jambs | Clearance must allow alignment, insulation and sealant movement without forcing the frame out of square |
| Substrate flatness at bearing and sealing areas | Local irregularity ≤ 3 mm over 1 m | Millimetres over a 1 m straightedge | Straightedge and level inspection | Repair loose, cracked or uneven surfaces before placing packers or applying sealant |
| Support packers under frame | Rigid, non-compressible packers at load-bearing points | Position and material requirement | Visual inspection before the perimeter joint is closed | Place packers below mullions, meeting stiles and hardware load points; do not use foam as structural support |
| Low-expansion insulation foam | Fill approximately 80–90% of the joint depth | Installation fill level | Inspection before covering the joint | Use low-expansion material compatible with the frame; protect it from UV exposure and moisture |
| Interior airtight seal | Continuous and stronger than the exterior seal | Perimeter sealing layer | Visual inspection and air-leakage check | Use a compatible airtight membrane, tape or sealant; seal around anchors and corner joints |
| Exterior weather seal | Continuous, elastic and weather-resistant | Perimeter sealing layer | Visual inspection and adhesion check | Use a backer rod where required; maintain the sealant manufacturer’s recommended joint width-to-depth ratio |
| Sealant application temperature | Follow product data; commonly 5–35°C | Ambient and substrate temperature | Record site conditions during installation | Do not apply to wet, frozen, dusty or contaminated substrates |
| Glazing, Hardware and Final Commissioning | ||||
| Insulating glass unit edge clearance | Maintain the glazing system’s specified clearance; commonly 5–8 mm | Clearance between glass edge and frame or glazing rebate | Check setting blocks, packers and glass position | Glass must not contact the frame; setting blocks must support the unit without blocking drainage |
| Drainage path | Open and unobstructed | Drainage slots and channels | Visual check and controlled water test | Remove protective film, mortar, foam and sealant from drainage outlets |
| Operating force and alignment | Smooth operation without binding | Manual operation of sash, door leaf and hardware | Open, close, lock and unlock each unit at least three times | Adjust hinges and locking points only after the frame is confirmed plumb, level and square |
| Locking-point engagement | All specified locking points fully engage | Hardware function | Functional test with sash or door closed | Handle movement must be consistent; seals must compress evenly without excessive operating force |
| Post-installation air-leakage inspection | ≤ 1.50 | m³/(m²·h) at 100 Pa, where project testing is specified | Calibrated site or laboratory test | If the result exceeds the target, inspect corners, joints, glazing gaskets, thresholds and hardware penetrations |
| Documentation package | Complete before handover | Product and installation records | Document review | Include approved drawings, Uw calculation, test reports, glazing details, installation photos, maintenance instructions and warranty terms |