Buying a home with aging glass can turn a charming viewing into an expensive surprise. This guide, “Top 10 Home Repair Window Tips Every Buyer Needs,” focuses on practical inspection before signing.
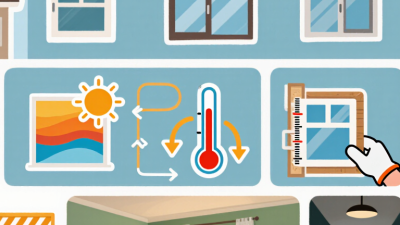
The U.S. Department of Energy reports that windows can account for 25% to 30% of residential heating and cooling energy use. That figure makes a loose sash more than a cosmetic concern. It may signal wasted energy, moisture entry, or hidden frame damage. ENERGY STAR guidance also emphasizes U-factor, solar heat gain coefficient, and proper installation when comparing replacement windows. Numbers matter.
Look closely.
Check for fogged insulated glass, soft wood, cracked glazing, difficult locks, and daylight around the frame. Run your hand beside the trim on a windy day. A cold draft is easy to feel, but concealed water damage may require a moisture meter. The National Fenestration Rating Council explains that certified ratings help buyers compare window performance consistently.
Building-science expert Dr. Joseph Lstiburek has repeatedly used a simple warning: “A window is a hole in the wall.” That phrase sounds obvious, yet buyers often inspect the view instead of the opening. The distinction matters. Good home repair windows work as part of a wall system, including flashing, insulation, drainage, and interior air sealing.
Some recommendations may not fit every climate or budget. I have seen buyers overvalue beautiful frames while missing failed seals beneath fresh paint. That is an uncomfortable lesson. Before negotiating, photograph each defect, request repair records, and obtain an independent estimate. These ten tips aim to make that process clearer, calmer, and more defensible.
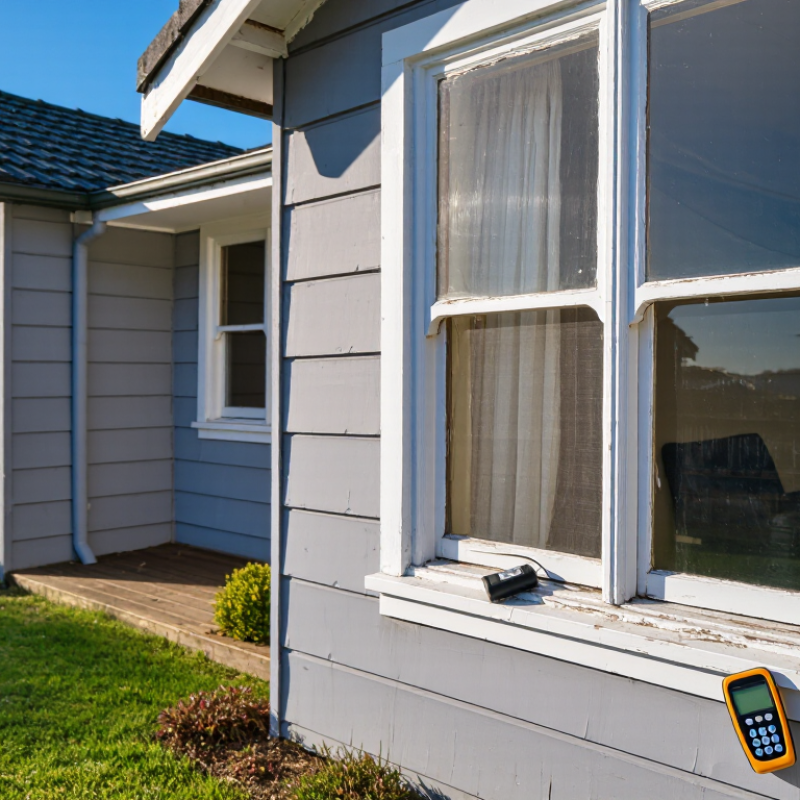
Before buying a home, inspect every window as a moisture barrier, not merely as a source of daylight. Open and lock each sash. Test for drafts with a thin tissue on windy days. Look for fogged glass, cracked glazing, soft wood, peeling paint, and water stains below the frame. Fog between panes often signals seal failure. A musty sill may indicate hidden leakage. It is easy to underestimate that problem.
The U.S. Department of Energy reports that windows can account for 25% to 30% of residential heating and cooling energy use. Poorly sealed units can therefore affect comfort and utility costs. Check whether the frames are level and whether locks engage without force. Examine exterior caulking, flashing, and drainage holes. A home inspector should use moisture readings around suspicious trim. The 2023 Remodeling Impact Report from the National Association of Realtors indicates that window replacement provides meaningful, though not complete, cost recovery. That matters when comparing repair estimates with purchase price.
Do not trust appearance alone. Fresh paint may hide swollen wood or repeated leaks. I would request repair invoices, installation dates, and previous inspection records. Small defects are manageable. Widespread rot is different. An imperfect inspection can still miss concealed damage, especially around bay windows and basement openings. Build a contingency for specialist review before signing.
Top 10 Home Repair Window Tips Every Buyer Needs?
Check for Drafts, Leaks, and Moisture Damage
A beautiful window can hide expensive problems. Test every frame, sash, and sill during the viewing. Move your hand slowly around the edges. Cold air often reveals failed seals or poor installation. Watch the curtains for movement. That small detail matters. Open and close each window without forcing it. Sticking may indicate swelling, frame movement, or hidden water damage.
Inspect the exterior after rain, if possible. Look for peeling paint, dark stains, cracked caulk, and soft wood. Check whether water drains away from the sill. Inside, examine corners for yellow marks, bubbling paint, or musty odors. A moisture meter can identify damp areas that feel dry. Do not guess. Ask a qualified inspector to verify serious concerns and document readings with photographs.
Condensation deserves careful attention. Occasional droplets may come from indoor humidity, but repeated moisture can damage trim and encourage mold growth. Check nearby flooring and drywall, not just the glass. I have seen buyers focus on visible cracks and miss swollen flooring below a leaking window. That mistake is easy to make. Request repair records, installation dates, and written estimates before negotiating. A small seal replacement differs greatly from structural rot behind the wall.
| No. | Inspection Area | What to Check | Common Warning Signs | Recommended Buyer Action | Priority |
|---|---|---|---|---|---|
| 1 | Window Drafts | Move a thin strip of tissue near the sash, frame, and meeting rail on a windy day. Check whether the window closes tightly. | Moving tissue, noticeable cold air, rattling sash, or uneven gaps around the frame. | Ask whether weatherstripping, sash adjustment, or full window replacement is needed. Include the finding in negotiations. | High |
| 2 | Water Intrusion | Inspect the interior sill, wall below the window, exterior joints, and nearby flooring after or during wet weather. | Water stains, peeling paint, swollen trim, soft drywall, or musty odors. | Do not assume caulk alone will solve the problem. Request a qualified inspection of flashing, drainage, and surrounding materials. | Urgent |
| 3 | Condensation | Look for moisture on the room-side glass, lower sash, frame, and sill, especially in bedrooms and bathrooms. | Repeated wet surfaces, black spotting, damaged finishes, or moisture trapped between insulated glass panes. | Improve ventilation and indoor humidity control, then determine whether the window seal or surrounding materials have failed. | High |
| 4 | Moisture Damage | Use visual inspection and, where appropriate, a moisture meter on trim and wall areas surrounding the opening. | Soft wood, discoloration, crumbling drywall, lifted flooring, or persistent musty smells. | Identify and stop the moisture source before repairing finishes. Damaged materials may require removal and drying. | Urgent |
| 5 | Glass Seal Failure | Examine double- or triple-pane glass from different angles in bright light. | Fogging, haze, droplets, or mineral deposits between panes that cannot be cleaned from either side. | Obtain a repair or replacement estimate. A failed insulated glass unit can reduce clarity and insulating performance. | High |
| 6 | Operation and Egress | Open, close, lock, and tilt each operable window. Confirm that required sleeping-room windows can be opened for emergency escape. | Sticking, broken balances, failed locks, painted-shut sashes, or restricted opening. | Have defects repaired before relying on the window for ventilation or emergency exit. Verify local code requirements. | Urgent |
| 7 | Exterior Caulk and Joints | Check the perimeter sealant, corner joints, sill area, and transitions between window frames and siding or masonry. | Cracks, gaps, shrinking sealant, separation, or missing sections. | Repair only after confirming that the joint is clean, dry, and properly prepared. Caulk should not block designed drainage paths. | Medium |
| 8 | Flashing and Drainage | Look for head flashing, sill drainage, weep openings, and unobstructed paths for water to exit around the window. | Blocked weep holes, missing metal or membrane flashing, staining below the opening, or water pooling at the sill. | Request a building-envelope assessment if flashing cannot be verified or if leakage is present. | Urgent |
| 9 | Frame and Sill Condition | Press gently on wood trim and inspect for cracks, rot, corrosion, distortion, or movement around the frame. | Soft or crumbling wood, rusted fasteners, cracked vinyl, warped frames, or gaps at the sill. | Differentiate a surface repair from structural or opening damage. Obtain a specialist opinion when the frame has shifted. | High |
| 10 | Interior Air Quality and Mold | Inspect corners, curtains, blinds, trim, and nearby wall surfaces for visible growth or recurring dampness. | Visible mold-like growth, persistent odor, allergic irritation, or repeated condensation. | Document affected areas and correct the moisture source. Seek qualified remediation advice for extensive or hidden contamination. | Urgent |
Buyer note: A visual inspection can identify warning signs but cannot confirm concealed damage. For active leaks, suspected rot, structural movement, or extensive moisture damage, obtain an independent qualified inspection before completing the purchase.
Top 10 Home Repair Window Tips Every Buyer Needs?
During a home inspection, examine the glass in changing light. Small chips can expand after temperature changes. Look for fogging between panes, which often signals failed seals. Run a clean hand over the interior surface. Uneven temperature may reveal hidden drafts. Do not ignore cracked glazing near corners. It can worsen when the frame shifts.
Check every frame, including basement and bathroom windows. Wood should feel firm, not soft or spongy. Inspect vinyl or metal frames for warping, gaps, and loose joints. Press gently around the sill. Water stains, peeling paint, or darkened wood deserve careful questions. I once focused on the glass and missed a swollen lower frame. That mistake changed my repair estimate.
Test each lock without forcing it. A secure latch should engage smoothly and hold the sash tightly. Examine screws, strike plates, and visible corrosion. Open every window several times. It should move evenly, stay open, and close without rubbing. Try casement, sliding, and tilt functions separately. Listen for grinding or sudden drops. Some stiff windows only need cleaning, but others hide balance problems. Take close photographs before negotiating repairs. Small details matter.
Top 10 Home Repair Window Tips Every Buyer Needs?
Estimate repair costs before judging a window’s appearance. Look for cracked glass, soft wood, failed seals, and water stains beneath the sill. Open and close each window slowly. Sticking often signals frame movement, swelling, or poor installation. Check locks, hinges, screens, and visible drainage holes. On a windy day, feel for cold air around the edges. A thin tissue can reveal movement. Ask for repair records, invoices, and previous inspection notes. Measure the frame from several points, because older openings are rarely perfectly square. Photograph damaged areas beside a ruler for clearer contractor estimates. These details help separate a minor repair from a replacement project.
Repair costs may include glass, hardware, sealant, labor, interior trim, and exterior access equipment. Request itemized quotes, not one impressive total. Compare the repair price with replacement, expected lifespan, energy loss, and future maintenance. A qualified window professional should explain ventilation, moisture control, and local installation requirements. Do not trust savings based only on advertised energy claims. Ask for written performance details and installation coverage. My first estimate was too low because I missed hidden sill rot. That mistake still matters. Leave a contingency, often 10 to 20 percent, for concealed damage. Replacement may make sense when frames are warped, leaks continue, or several components fail together. Repair may be wiser when the frame remains solid and the defect is isolated. Get at least two independent assessments before deciding. Nearby dust, peeling paint, or a damp smell deserves another inspection.
Estimated U.S. residential window repair costs compared with common full-window replacement costs.
Typical repair costs range from about $75 for basic hardware replacement to $700 for extensive frame or structural work. Full replacement commonly costs approximately $450–$1,500 per window, depending on size, material, glazing, installation difficulty, and local labor rates. Buyers should inspect drafts, condensation, damaged seals, frame rot, operation, locks, screens, and surrounding water damage before comparing repair and replacement options.
After closing, window repairs deserve a measured plan, not rushed replacement. The U.S. Department of Energy reports that windows can cause 25–30% of residential heating and cooling energy use. Begin with a room-by-room inspection. Check cracked glass, loose locks, failed seals, soft sills, and water stains after rain. A tissue held near the frame can reveal noticeable drafts. Photograph each issue before requesting estimates.
Tips: Prioritize leaks and unsafe glass before cosmetic flaws. Ask a qualified window professional to inspect flashing, drainage paths, and surrounding wall damage. Compare repair costs with replacement costs, including trim, labor, and disposal. The 2024 Cost vs. Value Report places average replacement cost recovery near two-thirds for common window projects, but local prices vary widely. Treat that figure as guidance, not a promise.
Small repairs may still matter. New weatherstripping, adjusted hardware, or sealed exterior joints can improve comfort quickly. However, condensation between panes usually signals failed insulating glass, not merely dirty windows. I would avoid choosing a product from appearance alone. Frame material, orientation, climate, and ventilation all affect performance. My own plan would leave a contingency budget, because hidden sill damage often appears only after trim is removed. Recheck repaired windows during the next heavy rain and winter cold spell.