How to Install Windows and Doors in 2026
A well-fitted window or exterior door can reduce drafts, help keep rain outside, and make a room more comfortable. But even a quality product can perform poorly if the opening is out of square or the sill is not prepared properly. Window door installation takes careful measuring, steady handling, and attention to the manufacturer’s instructions. Measure the opening at several points, since older walls may not be perfectly even. Small gaps matter.
This guide to installing windows and doors in 2026 walks through the decisions and practical checks that shape a reliable project. It covers choosing suitable products, preparing the opening, setting the frame with shims, checking for level and plumb, and sealing against moisture and air leaks. A level, tape measure, flashing, and compatible sealant are not glamorous tools, but each has a clear job. Product details vary, so one method will not fit every frame or wall. That is worth remembering.
Careful work helps, but it cannot correct every hidden problem. Rot, damaged framing, or an opening that shifts during installation may call for an experienced professional. Follow product guidance and applicable local requirements, and avoid covering uncertain damage with trim or sealant. The aim is not simply to make a window or door look neat. It is to create a secure fit that opens smoothly, sheds water, and holds up through daily use. Even a careful installer should pause and recheck.
Check Local Codes and Product Instructions; Use ASTM E2112 Installation Guidance
Before fitting a frame, check the locally adopted building code and the product’s current installation instructions. Requirements can vary by location, climate, and opening type. ASTM International’s E2112 provides recognized guidance for installing exterior windows, doors, and skylights. It does not replace local code or product-specific instructions. Check twice.
Confirm rough-opening dimensions, substrate condition, and required clearances against the product sheet. A square frame matters, but so does the water-management sequence. Follow the specified flashing details, including how the sill, jambs, and head connect. DOE Energy Saver estimates that windows account for 25%–30% of home heating and cooling energy use through heat gain and loss. That estimate is a reminder, not a promise of savings: poor fit or skipped sealing can undermine performance.
Use compatible flashing, sealants, shims, and fasteners in the sequence the instructions require. Keep drainage paths open. A useful pause: recheck plumb and reveal after fastening. A frame can look straight and still bind. Photograph concealed flashing and fastener placement before trim covers them. Those records help with later checks, though they cannot confirm every joint is sound.
Measure the Opening and Verify IRC Egress: 5.7 ft² Clear Area Where Required
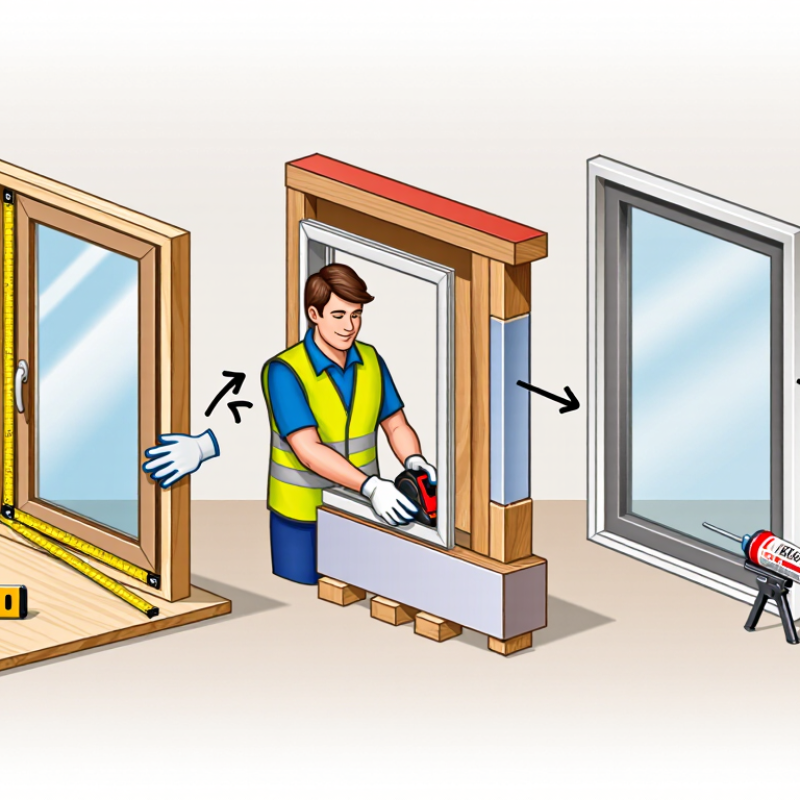
Before installing windows or doors, measure the rough opening at several points. Check width at the top, middle, and bottom, then compare both sides for height. Use the smallest measurements when checking fit. A level and tape measure help reveal a bowed jamb or a sill that slopes slightly. Small details matter.
For a window serving as an emergency escape and rescue opening, measure the clear opening—not the frame or sash dimensions. Where the adopted International Residential Code requires it, the opening generally needs at least 5.7 square feet of net clear area. Grade-floor openings may have a 5.0-square-foot minimum under the IRC. Other requirements, including opening height and width, also apply. A window’s label or advertised size does not confirm compliance.
Before setting the unit, confirm the local code edition and any amendments with the building department or qualified inspector. Open the window fully and measure the unobstructed space between stops and sash. Screens, hardware, and limited sash travel can reduce usable area. Even careful measurements can miss a restriction; checking the actual opening is worth the extra minute. After installation, operate the window and verify that it opens freely. Seal gaps without blocking drainage paths.
Prepare the Sill Pan and Flashing in Shingle-Lap Order per ASTM E2112
Before setting a window or door, prepare the sill pan as the first drainage layer. ASTM E2112 describes installation practices that coordinate components with the wall’s water-resistive barrier. Follow the project details and unit instructions; one detail does not fit every wall. Form a continuous pan with a slight outward slope, a back dam, and sealed end dams. Water runs downhill. Check corners carefully. A tiny gap can give wind-driven rain a route into the framing, even when the visible seal looks neat.
Install the unit, then layer jamb flashing over the pan edges. Add head flashing over the jamb flashing, and lap the upper wall membrane over the head flashing. This shingle-lap order lets water drain outward instead of behind the assembly.
DOE Energy Saver guidance says air sealing can reduce household energy bills by 10% to 20%; that figure applies to whole-home air sealing, not window flashing alone. Still, a well-sequenced opening can help limit unwanted air and water paths.
It is tempting to rely on caulk as the fix. That is worth questioning: sealant ages, and drainage details should do the primary work. Inspect the sill before covering it. Check the laps again.
Set, Shim, and Fasten the Frames; Provide ADA’s 32-in. Clear Doorway Where Required
How to Install Windows and Doors in 2026
Set each frame in the rough opening and check it for level, plumb, and square. Use shims beside fasteners, near hinges, and at latch points. Add support where the frame bows, but do not force it straight with screws. Open and close the door before finishing; a rubbing edge often reveals a frame that shifted. Small errors matter.
For accessible routes, confirm whether applicable codes require at least 32 inches of clear doorway width. This is the usable opening, not the width of the door slab. Measure with the door open as required by the governing standard, accounting for stops and hardware. Check the approved plans and local requirements before fastening the frame permanently. A rushed measurement can still fool a careful crew.
Tips: Measure the clear opening twice, then recheck after shimming. Drive fasteners gradually and inspect the gap around the door. If the reveal changes, pause and adjust the shims before adding more screws.
Insulate, Air-Seal, and Test; Record NFRC U-Factor and SHGC Ratings
How to Install Windows and Doors in 2026
Insulate, Air-Seal, and Test; Record NFRC U-Factor and SHGC Ratings
Set each window or door square, level, and plumb before fastening it. Check the frame diagonals; uneven measurements can signal a twist. Use shims at fastening points, but do not bow the frame. Small gaps matter. Fill the rough opening with compatible insulation, applying low-expansion foam gently so it does not push the jamb inward. Seal the interior perimeter continuously, and preserve the exterior drainage path. A neat bead is not a substitute for correct flashing.
Tips: Keep foam out of moving parts. Let it cure. Trim excess only after curing, then inspect corners and sill edges closely.
After installation, operate every sash and door leaf. Look for sticking, uneven reveals, or daylight around the closed frame. A smoke pencil can help locate drafts; for broader checks, arrange a controlled blower-door test with a qualified professional. Retest after sealants cure, since uncured materials can affect results. Keep the product’s NFRC label or documentation, and record the U-factor and SHGC for the exact unit installed. These ratings describe energy performance, not the quality of the installation. It is easy to rush the paperwork; I would record each unit’s location and rating before the label gets misplaced.
How to Install Windows and Doors in 2026
Insulate, air-seal, and test; record the NFRC U-factor and SHGC ratings shown on each product’s label.
Lower U-factor means less heat transfer. The bars show the mathematical reciprocal of the example U-factors (R-equivalent = 1 ÷ U-factor); they are conversion examples, not product ratings. Record the actual U-factor and SHGC from each installed product’s NFRC label. SHGC is the fraction of solar heat admitted through the product, expressed from 0 to 1. Insulate the rough opening, air-seal the perimeter, and check operation after installation.